Many people check their blood pressure at home now and wrist monitors are often the first choice. They are small, easy to carry, and do not feel tight like upper-arm cuffs sometimes do.
But wrist monitors are sensitive to position. Even a small change in wrist height or arm posture can make the reading higher or lower than your true blood pressure. That’s why proper positioning matters most.
If you have ever taken a reading that seemed too high or too low, there is a chance it was due to wrong wrist placement, not your actual health.
This guide shows you how to use a wrist blood pressure cuff perfectly so you can get readings you can trust.
How to Take Blood Pressure on the Wrist Correctly
Getting a reliable blood pressure reading starts long before you press the start button. Most people fail to realize that caffeine, nicotine, or a quick walk can spike blood pressure for up to thirty minutes. Sitting quietly in a chair with back support for at least five minutes allows the body to reach a true resting state.
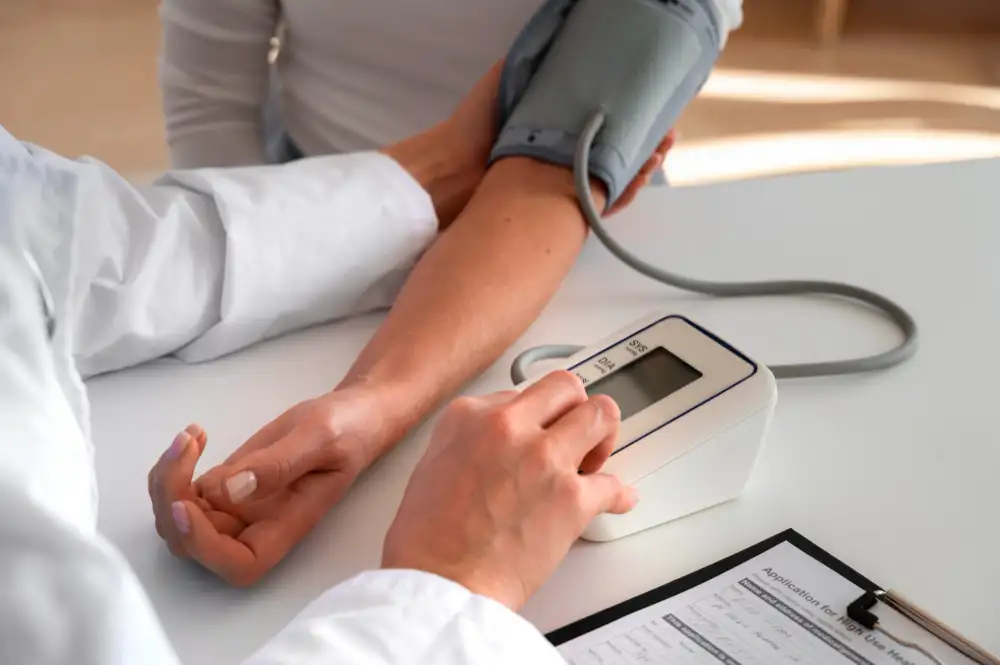
Secure the cuff on bare skin rather than over a shirt sleeve. Clothing creates uneven pressure that confuses the sensors. Wrap the band about half an inch below the palm line on the inside of the wrist. Keep the fastener snug but comfortable. A loose cuff leads to inaccurate data, while an overly tight one causes physical discomfort that might raise your heart rate.
Proper Wrist Position for Accurate Blood Pressure Reading
Gravity dictates the accuracy of every wrist-based measurement. Blood pressure readings increase by roughly 10 mmHg for every few inches the arm drops below the heart. Therefore, keeping the wrist at heart level is the absolute golden rule for accuracy.
Rest your arm against your chest so the monitor sits at the same height as your breastbone. Most mistakes happen when patients rest their arm on a desk or their lap, which forces the heart to work against gravity.
Keeping the palm facing up and the fingers relaxed prevents muscle tension from squeezing the blood vessels. Maintaining this steady position throughout the entire inflation and deflation cycle ensures the sensor captures a clean pulse.
Step-by-Step Guide to Using a Wrist Blood Pressure Monitor
Accurate readings depend on following a simple, repeatable routine. First, empty your bladder, as a full one can add ten points to your systolic number. Sit with both feet flat on the floor and avoid crossing your legs. Once you are in a good position, you should know how to use a wrist blood pressure cuff and the correct position for a wrist blood pressure monitor.
Put on the cuff and lift your arm to the center of your chest. Press the start button while remaining completely silent. Talking or moving your head during the process creates “noise” in the reading. Take two or three measurements about one minute apart to find an average. Often, the first reading is slightly higher due to the initial squeeze of the cuff. Recording the average of the second and third attempts provides a much more realistic view of your daily heart health.
Give Your Body a Moment to Settle before You Start

The change in blood pressure depends on what your body is doing. If you walk, talk, rush, or even think intensely, your numbers temporarily increase. So instead of immediately putting the cuff on and pressing the start button, take a small pause.
Sit in a chair with your back supported. Place your feet flat on the floor, not crossed. Rest your hands gently on your lap or the table. Breathe normally and wait two to five minutes. This short pause helps your body return to its natural resting level, so the number you see reflects your real baseline.
This short step often helps with how to take BP with wrist cuff with minimal chances of inaccurate results.
How to Properly Position Yourself for Wrist Blood Pressure Monitoring
The wrist blood pressure monitor measures blood flow in the radial artery. It reacts quickly to posture changes. That is why accuracy depends on how your arm is positioned, not just how the cuff fits.
Arm Placement for Blood Pressure
Rest your forearm on a table or cushion. Your arm should feel supported, not held up by muscle strength. When your shoulder is tense or lifted, it can push your blood pressure higher. Allow the weight of your arm to settle naturally.
Your hand should be relaxed, with fingers slightly loose. Avoid clenching a fist or pressing your hand into the table.
Proper Blood Pressure Cuff Position
Place the cuff on your bare wrist, about half an inch below the wrist crease. Make sure the sensor rests on the inner wrist (the side where your pulse is). It should be snug but comfortable. It should be tight enough not to slide and loose enough that it does not pinch. What matters more than tightness is correct sensor alignment and wrist height.
Raising the Wrist to Heart Level
You need to follow some wrist blood pressure cuff instructions to get accurate results. Bring your hand up so your wrist is level with the center of your chest. The easiest way is to rest your forearm on a pillow or folded towel so the wrist lifts naturally without effort. If your wrist isn’t at heart level, readings can be inaccurate:
- If your wrist is lower than your heart, the reading will appear higher.
- If your wrist is higher than your heart, the reading will appear lower.
Keep your palm facing up and your wrist straight, not bent. Most mistakes come from positioning, not due to a faulty device.
Common Mistakes When Measuring Blood Pressure on the Wrist
Small errors lead to big discrepancies in your logs. Bending the wrist backward or forward remains a leading cause of failed readings. The joint must stay straight and neutral to allow blood to flow freely under the sensor. Another frequent issue involves “arm drift,” where the arm slowly slides down the chest during the minute-long measurement.
Movement of any kind, including fidgeting with your other hand or watching television, introduces enough vibration to skew the results. If the monitor shows an unusually high reading, check your arm’s height first. Most false highs come from an arm positioned too low, rather than an actual spike in blood pressure.
How to Take BP with a Wrist Cuff (Step-by-Step)

To get an accurate reading, follow these simple steps from start to finish:
- Put the cuff on the wrist correctly.
- Sit calmly and breathe normally.
- Rest your forearm on a table or pillow.
- Raise your wrist so it is level with your heart.
- Press start and stay still.
- Let the device finish the reading without talking or moving.
- Wait one minute and take a second reading.
- Use the average of the two readings for a more stable measurement.
When a Wrist Monitor Might Not Be the Best Fit
Some people have arteries that are stiffer making wrist cuffs to read accurately. This can happen with age, diabetes, or certain circulation conditions. In those cases, an upper arm blood pressure cuff may provide more accurate numbers.
But mostly people can use wrist monitors successfully, especially when they follow proper positioning carefully and track readings over time instead of reacting to single numbers.
Wrist vs. Arm Blood Pressure Monitor: Which is More Accurate?
Upper arm monitors remain the preferred choice for clinical accuracy because the cuff naturally sits level with the heart. Wrist monitors offer a portable alternative but require much stricter technique to match the precision of an arm cuff.
| Feature | Upper Arm Monitor | Wrist Monitor |
| Accuracy | High (Gold Standard) | Moderate (Technique Dependent) |
| Ease of Use | Requires more effort | Very easy and portable |
| Best For | Daily medical tracking | Travel or large arm sizes |
Patients with very large arms or those recovering from breast cancer surgery often find wrist monitors more comfortable. However, users must accept that the convenience of a wrist device comes with the responsibility of perfect BP cuff positioning. If a doctor needs highly precise data for medication adjustments, they will likely recommend an upper-arm monitor.
A Simple Way to Get Help if You Need It
If you still feel unsure about interpreting your numbers, you can speak with our licensed providers online through Simple Consult. We offer $29 flat-fee visits, no insurance needed, and prescriptions can be sent to your pharmacy on the same day. It is helpful when you want guidance without waiting for long clinic appointments.
Final Takeaway
Wrist blood pressure monitors can be just as useful as upper arm monitors when used correctly. The key is not the device itself but your wrist position. Keep your wrist at heart level, your arm supported, and your body relaxed. Once you get comfortable with the posture, your readings become steady and meaningful, helping you understand your health with more confidence.
Frequently Asked Questions
Place the cuff on your bare wrist and keep your wrist level with your heart while sitting relaxed. Keep the wrist straight and arm supported.
They can be accurate only if the wrist is held at heart level and you stay still during the reading.
It means the inflatable part of the cuff should cover 80% of the arm’s circumference and 40% of the arm’s length for accurate readings.
Place the cuff 1 inch above the elbow, snug but not tight, with the tubing centered on the inner arm and the arm resting at heart level.
Wrist monitors provide accurate results only when the user follows the heart-level rule perfectly. These devices are extremely sensitive to arm height and body movement.
For complete accuracy, arm placement for blood pressure is an important factor. Rest the wrist against the center of the chest at heart level. Avoid letting the arm hang down or resting it flat on a low table.
Positioning the arm below the heart or bending the wrist usually causes false high readings. Resting for five minutes before the test often brings these numbers back to a normal range.
Upper arm monitors generally offer better accuracy and are less sensitive to movement. Wrist monitors are a good alternative for travelers or people who cannot fit into standard ankle cuffs.
Stay still, keep your feet flat, and hold the monitor at heart height. Taking multiple readings and averaging them also helps eliminate one-time errors.


Add comment